GPT Generates PSD Layered Files: A Complete Tutorial
Ever wanted to take an AI-generated image and break it apart into editable layers inside a PSD file? In this tutorial, we'll walk through the entire workflow: generating a poster with GPT, splitting it into individual elements, and then reassembling those elements into a fully layered PSD file — all using carefully crafted prompts.
Overview of the Workflow
The process consists of three main steps, each powered by a specific GPT prompt:
- Generate a Poster — Use GPT to create a promotional poster from scratch.
- Split Elements — Ask GPT to break the generated image into separate PNG layers.
- Reassemble into a PSD — Combine the extracted PNGs back into a single layered PSD file.
Prerequisites
Before you begin, make sure you have the following:
- Access to GPT-4o (or a model that supports image generation and code execution)
- A ChatGPT Plus or equivalent subscription with image generation capabilities
- Basic familiarity with image editing concepts (layers, transparency, PSD format)

Step 1: Generate a Poster
The first step is to generate a base image that we will later split into layers. We'll use a simple, direct prompt to create an iPhone promotional poster.
Prompt:
Generate a promotional poster introducing the iPhone. The poster should feature a sleek product shot, bold headline text, and a clean modern design with a gradient background.
The original Chinese prompt was: 生成一张介绍iPhone手机的海报.
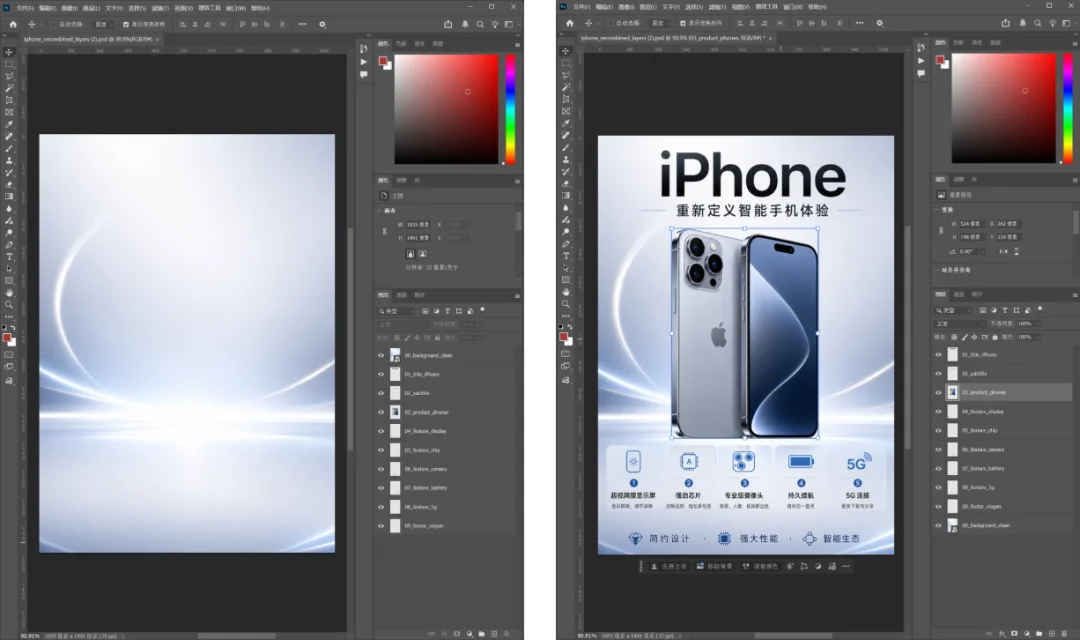
GPT will generate a visually appealing poster like the one below:
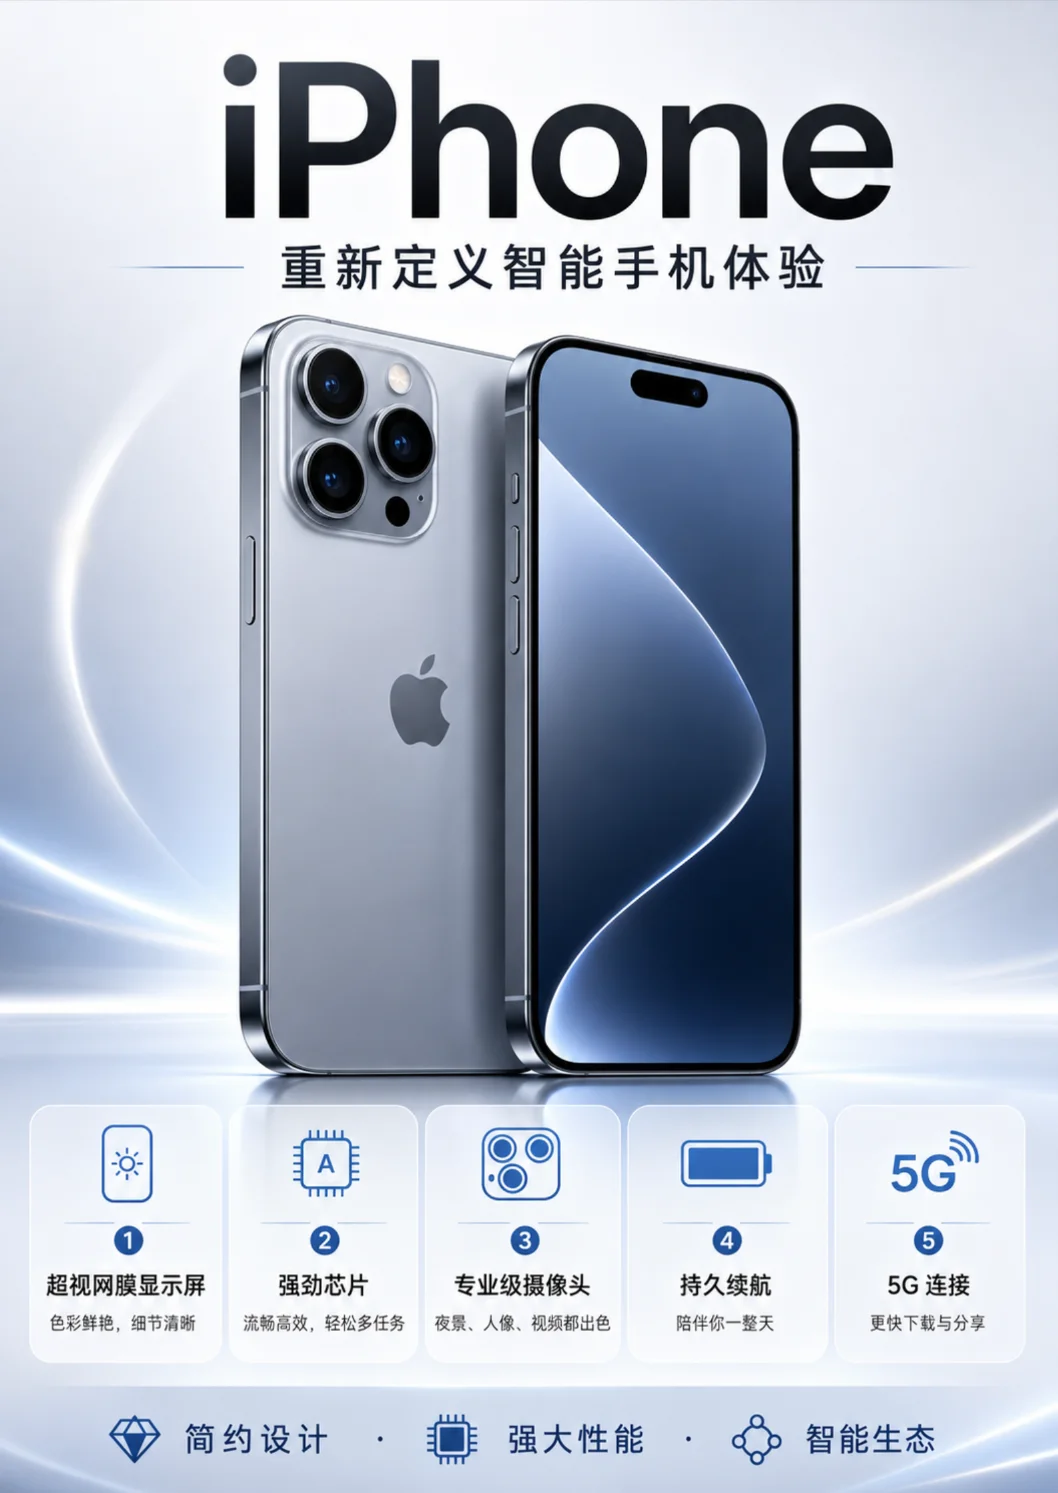
This poster contains multiple visual elements: the background gradient, the phone image, headline text, body copy, and possibly decorative shapes. Our next step is to isolate each of these into its own layer.
Step 2: Split the Image into Elements
Now we ask GPT to analyze the generated poster and split it into separate visual elements, each saved as an individual transparent PNG file. This is the key step that enables non-destructive editing later on.
Prompt:
Analyze the image you just generated. Split it into distinct visual elements (background, main subject, text layers, decorative elements, etc.) and generate each element as a separate transparent PNG. Keep the original positioning and dimensions. Export each layer individually.
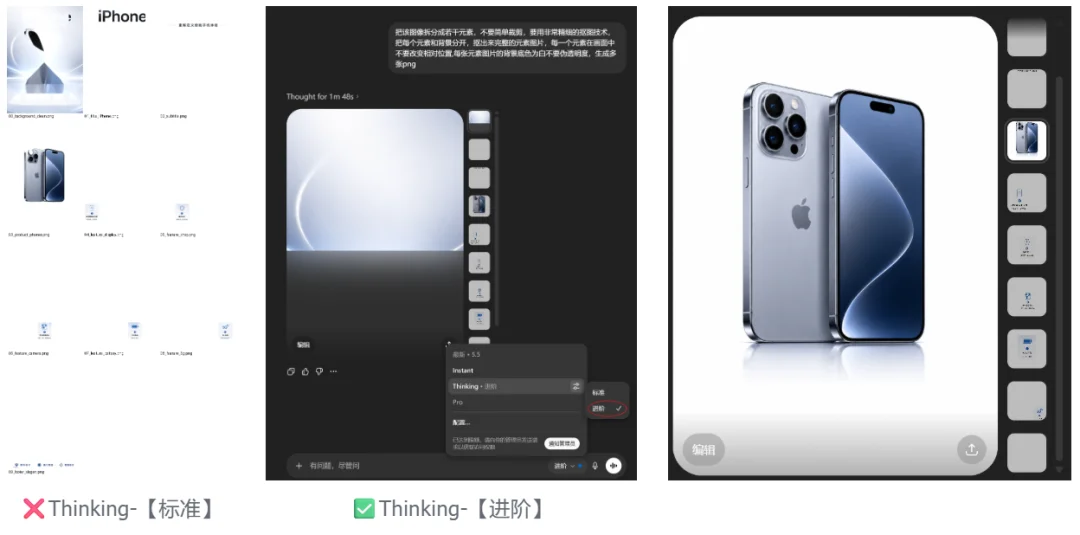
After running this prompt, GPT will produce multiple PNG images — one for each detected element. These might include:
- Background layer — the gradient or solid-color backdrop
- Product image — the iPhone product shot, isolated
- Headline text — the main title text on a transparent background
- Body text — smaller descriptive copy
- Decorative elements — any icons, shapes, or accents

Step 3: Reassemble into a PSD File
The final step is to take all the individual PNG layers and combine them into a single PSD file with proper layer names and ordering. GPT can generate a Python script (or similar) to do this automatically.
Prompt:
Now take all the individual PNG layers you just created and combine them into a single layered PSD file. Name each layer descriptively (e.g., "Background", "Product", "Headline", "Body Text", "Decorations"). Maintain the correct stacking order and canvas size. Provide the PSD file for download.
Once GPT processes this prompt, you'll receive a fully layered PSD file that you can open in Adobe Photoshop, GIMP, Photopea, or any other editor that supports the PSD format. Each layer will be independently editable — you can change colors, move elements, swap text, or replace images without affecting the rest of the design.
Conclusion
With just three carefully crafted prompts, you can go from a blank canvas to a fully editable, layered PSD file — entirely within GPT. This workflow is especially useful for:
- Quick prototyping of marketing materials
- Creating editable templates from AI-generated designs
- Extracting elements from AI art for compositing
- Learning how AI-interpreted images can be broken into components
Experiment with different source images and splitting strategies to get the best results. The more distinct the visual elements in your original image, the cleaner the layer separation will be. Happy editing!